
 Back to tutorials
SEPARATIONS:
CREATING STENCILS FROM VECTOR ARTWORK IN ILLUSTRATOR
STEP 1: Open your file in Illustrator, and set artboard to A3. Add bleed + crop marks if artwork is being trimmed. Now make a new layer for each colour stencil.
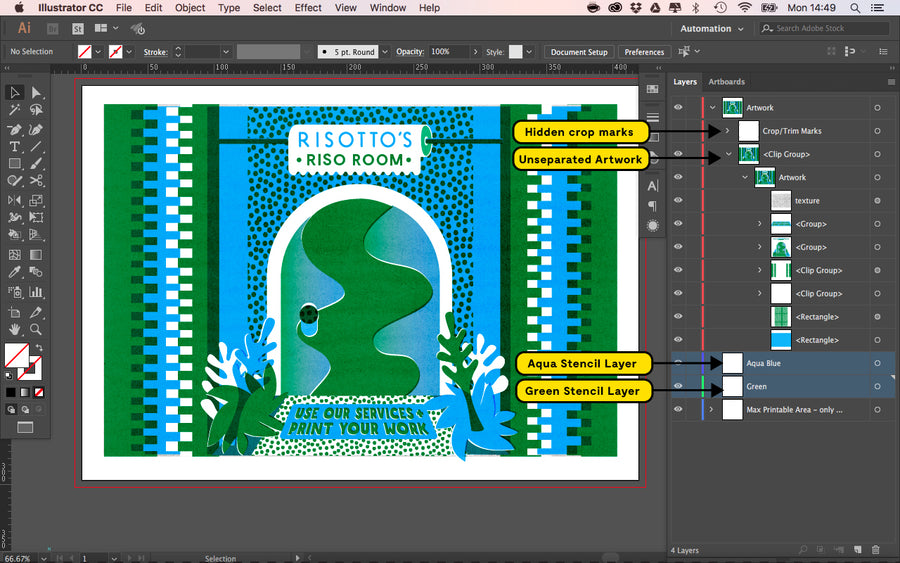
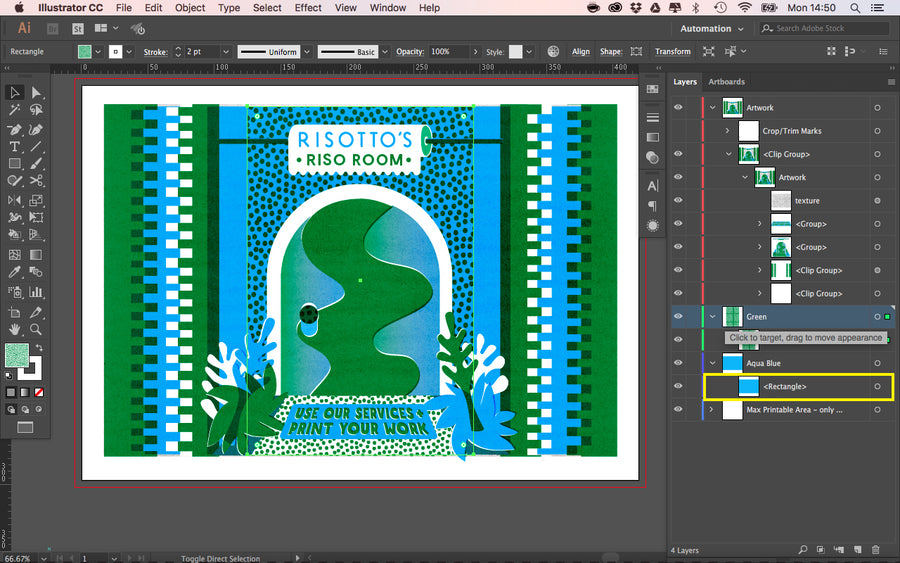
STEP 2: Starting from the bottom, begin to sort layers of the artwork that correspond to the stencil colours. Seen here, Blue elements are moved to the Blue group.
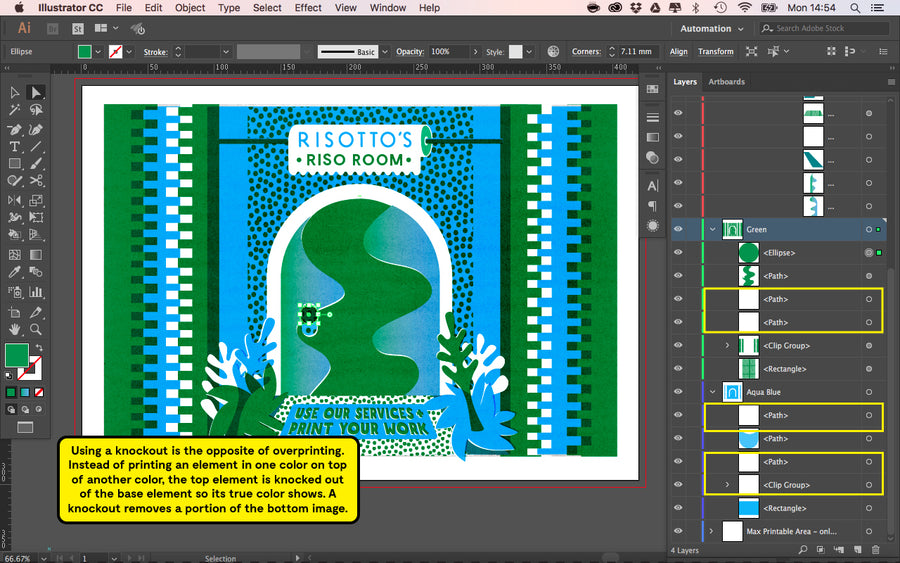
STEP 3: Continue to fill the groups with corresponding elements. Sometimes you may need to create duplicate shapes, filled white to achieve a ‘knockout’.
STEP 4: Some elements of your artwork may include ‘Live Paint’ groups. To separate these, select the element, click on the “Live Paint’ via the ‘Object’ menu, and ‘Expand’.
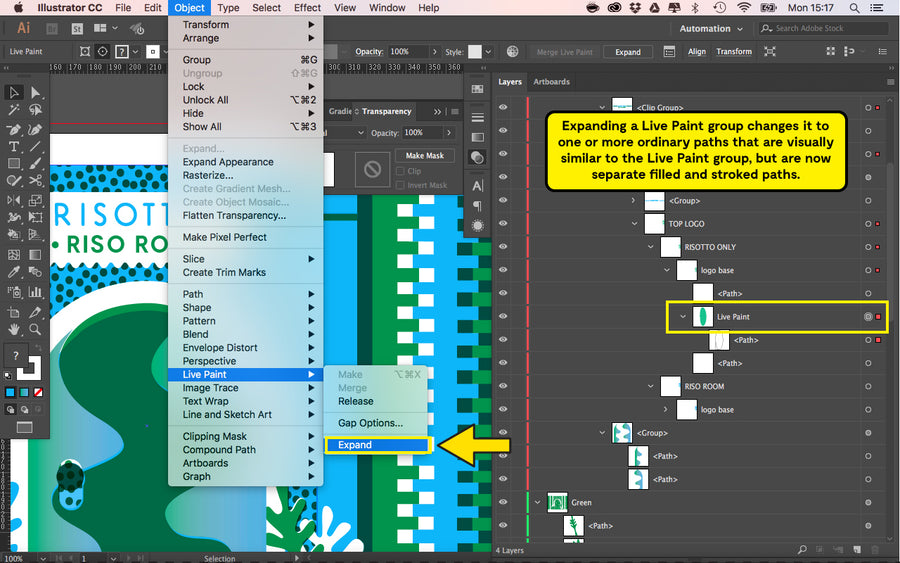
STEP 5: Some elements of your artwork may include ‘Live Paint’ groups. To separate these, select the element, click on the “Live Paint’ via the ‘Object’ menu, and ‘Expand’.
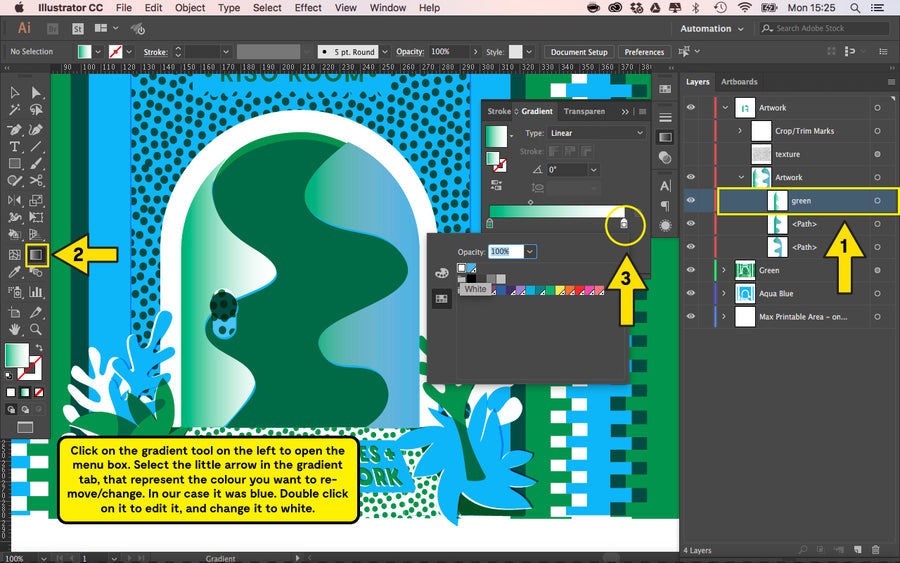
STEP 6: Repeat this process by transforming the origional gradient file into (in our case) the Aqua Blue gradient. We now have a dissected gradient, across two layers.
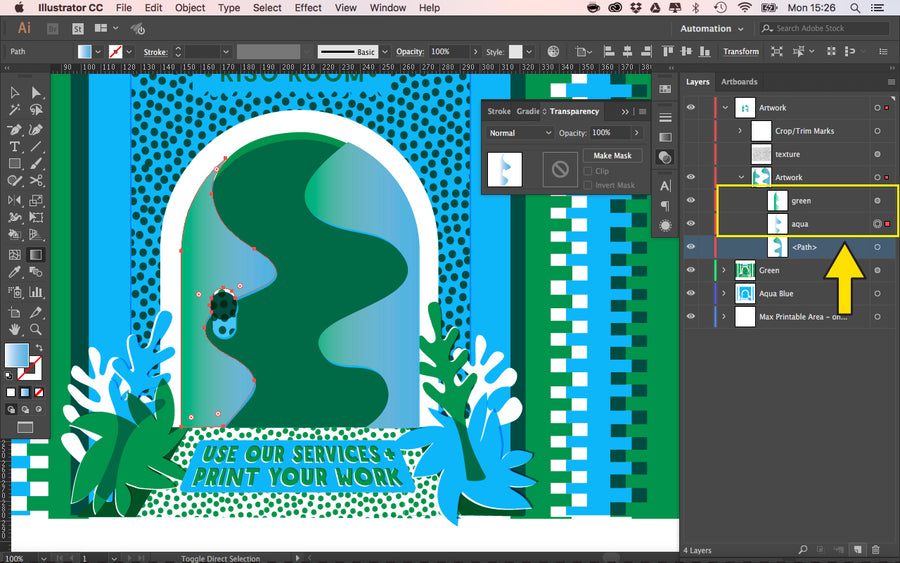
STEP 7: You can use blending modes to simulate/check your separations. Select the top layer, and in the ‘Transparency panel choose ‘Multiply' from the drop down menu.

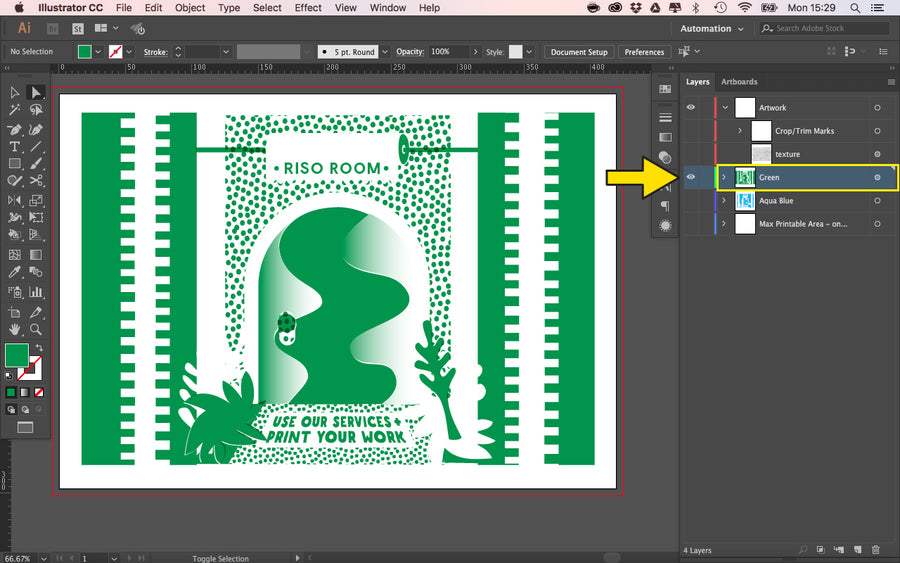
STEP 8: Now that you've separated your artwork into colour groups, you can begin to save your separations. Turn off all layers except your first chosen colour.
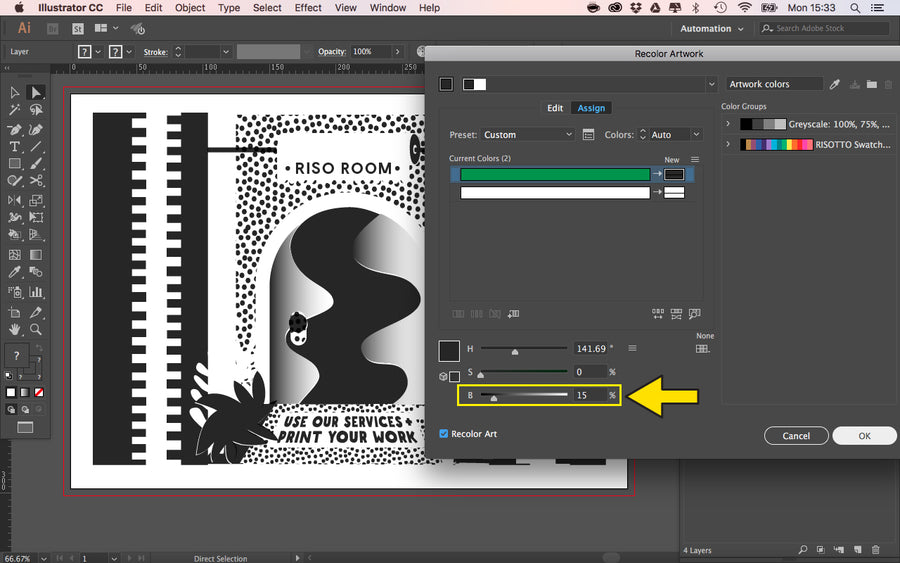
STEP 9: Select the colour group, and double click on 'Recolour Artwork' wheel from the top menu bar. In the 'Assign' settings, double click on the end box to edit to black.
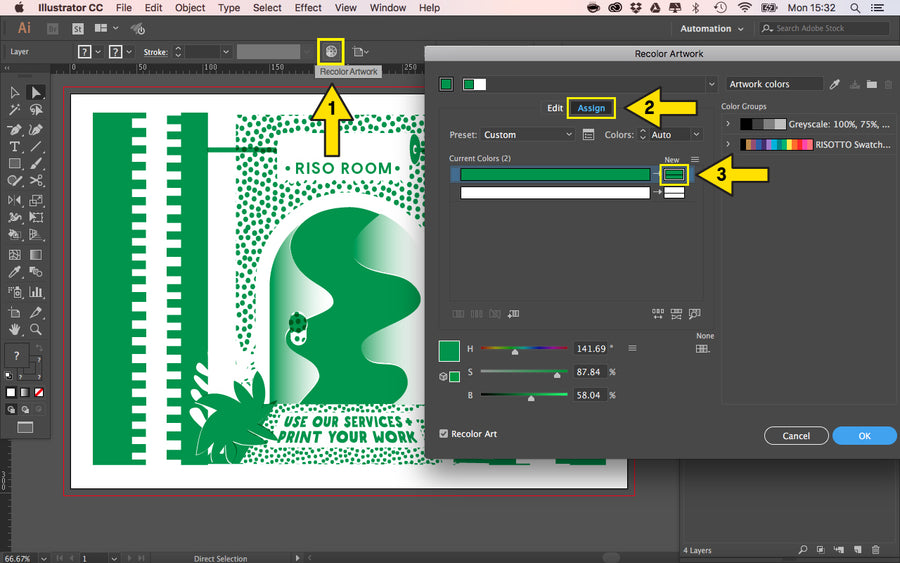
STEP 10: In this example we use the 'HSB'colour mode. We've set the blacks to 15% which ensures a good rich coverage, reducing the risk of marks and inconsistent coverage.
STEP 11: Now turn your 'Crop Marks' layer on (only if you're planning on trimming your work), and make sure the bleed is as it should be. Next, go to ‘File' and 'Save as...
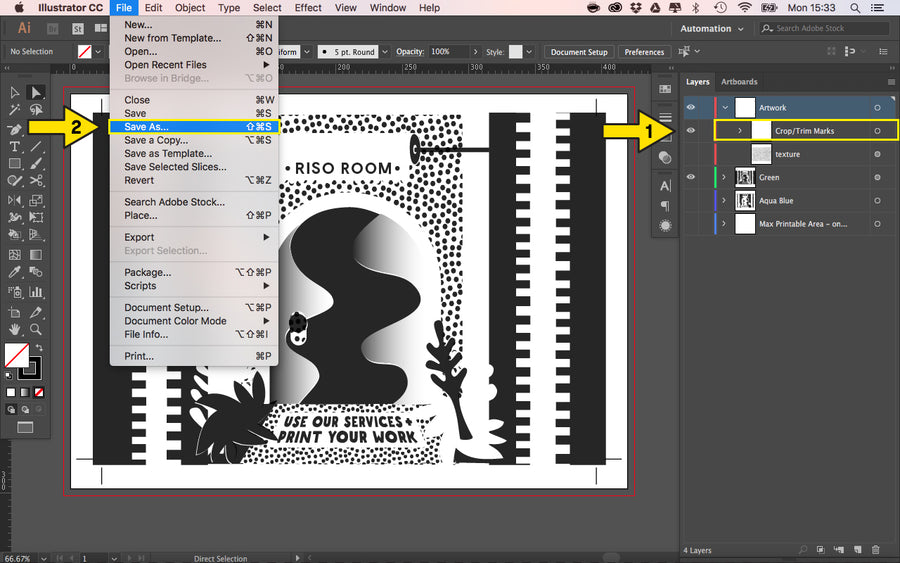
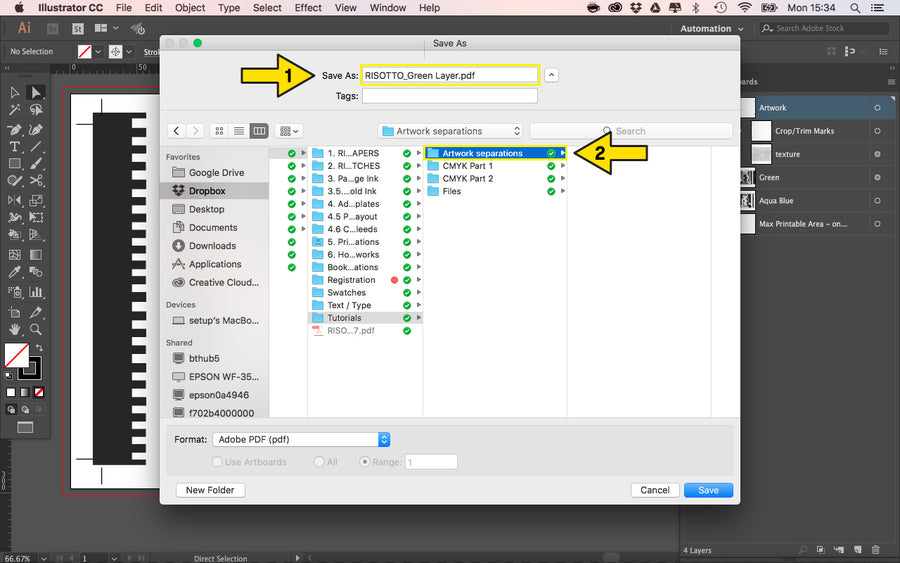
STEP 12: Name your file with your own name or Project Title and specify the colour you'd like it printed in. Eg. “RISOTTO_Green layer'- add 'Side A/B’ if printing double sided.
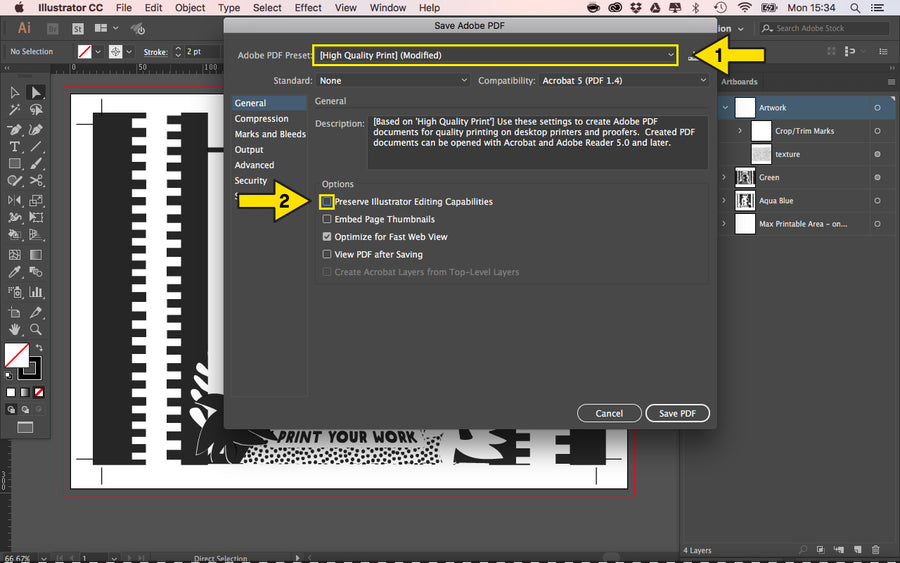
STEP 13: Save your PDF as a 'High Quality Print' and untick the ‘Preserve Illustrator Editing Capabilities. Everything else we keep as default. Hit 'Save PDF, and we're done.
STEP 14: Now repeat the process for your next layer. Here, we've turn off the previous "Green' layer in this case, and turn on the ‘Aqua Blue' keeping the crops the same.
